Friday, September 25, 2015

"Fall is in the Air"

Happy Friday morning everyone.   Fall is here, but the temperature doesn't know it yet. It was in the 80's  but the good thing no humidity to holler about.

I have three cards that I want to share with you. The first two cards are finished, but the third card I'm at a complete brain freeze on what sentiment to put on the front and the inside.

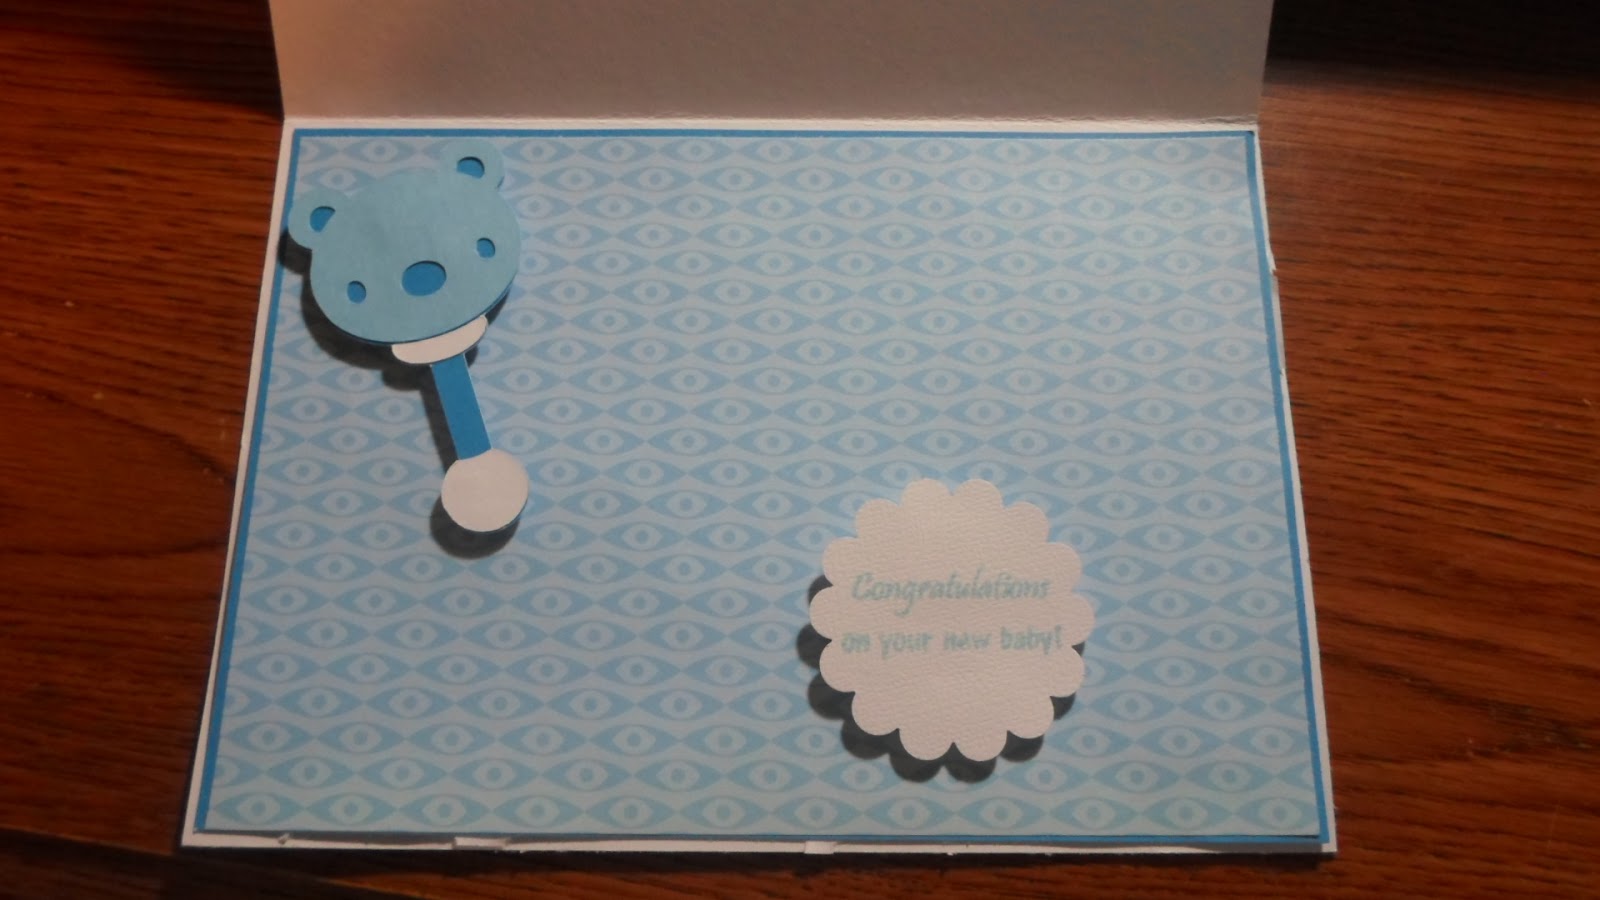
The first one is the one that I haven't added a sentiment because brain freeze set in.   Its an A2 size card using the Cuttlebug embossing folder from Provo Craft called   PUMPKIN PATCH. The ribbon I had in my stash.   The flower is from the $1.50 bin at Michaels. 


I needed  a Sympathy card for a friend that lost her husband and like most of us we hate making these kind of cards.  I decided use Anna Griffin/s Garden Window card making kit for this card.  I used one of her embossing folders called FOULARD.  If you click on the picture you can see what this folder looks like.  With the kit all I had to do what pick what I wanted and put it together.  Even the base card itself.  Plus there is a guide with pictures for inspiration and I just used that.  Very simple and easy to use but so pretty and it works perfectly for me.


On this card I used the same embossing folder that I used on the first card.  The Stamp set that I used is from CTMH called POSTER TIDINGS.  The ribbon that I used is from Michaels called Autumn Leaves. I used two leave brads that I had in my stash,  I think I had gotten them from Michaels last year but don't remember for sure.


Monday I have to go in for surgery for a Ovarian cyst.  That is what they think it is right now,  Its the size of a small orange.  Hopefully everything will be ok.   I'm not worried because I have NO pain at all.   We found it because I was having some back and leg pain and the Dr wanted me to have a MRI on my back and that was when they saw it.  So he sent me to have an ultra sound and that test confirmed it.  I told him that I wanted this done immediately because I had things to do and places to go.   He laughed and said what else is new.  So Monday I go. 

Thanks for stopping by and have a great weekend.  Enjoy the weather and get some crafting in.

Love everyone
Vickie

Monday, September 14, 2015

Anniversary Card

Happy Monday to everyone.   The kids are back to school, and a new week has started.   I did my cleaning the week.   I seem to clean on Mondays because its quieter around my house than all the other days. And of course my Favorite show started tonight "Dancing With The Stars" so I'm watching that. 

My card for today is and anniversary card that I made using the same paper stack that I had used yesterday for the wedding card.  the stack is called WEDDING from Making Memories. I will post the card and then let you know what I used.


     I decided to do a black and white card again with a  Anna Griffin ribbon from her Garden cards.  I used the Climbing Rose embossing folder from Anna Griffin.  The Sentiment if from Anna's Vellum sticker sayings "WELL SAID"  The Ribbon is also from Anna Griffin.


Thanks for looking and have a great week.  I will resume my cards starting next Tuesday. for I will be out of state.  


Sunday, September 13, 2015

Wedding Card.

Happy Sunday night to my fellow crafters.   I hope that you were able to get some ME time today, while your hubbies or boyfriends were glued to the TV watching Football. My grandkids and kids wee watching the Bears get beat while I was cooking.  

I did get to make a card while waiting for things to finish cooking.  I like the simple cards and just adding some ribbon or flower and your done.   I did emboss the  inside for the sentiment.  I will post the card and then let you know what I used.

                       The pattern paper that I used is called Wedding from Making Memories


      I used the Anna Griffin embossing folder called Smitten and embossed the white card stock.


 The sentiment that I used is also from Anna Griffin WELL SAID  vellum stickers  that I had gotten last year, 


                            I used the same embossing folder and embossed the envelope.

My card is an A2 size card  I used some ribbon and a flower  that I had gotten at Michael's.

Thanks for stopping by and I hope that you like my card.  Have a great week and I will see ya'll tomorrow with another card.

Saturday, September 12, 2015

HAPPY BIRTHDAY

Its been a crazy month since I last posted anything.  But that's life and sometimes it does put things on hold or in perspective. 
 I have lots of embossing folders and I saw a card when looking thru my emails, (sorry)  I don't remember you had it, but I thought I have that folder so I can make the card.

My card is a standard A2 card.   I embossed a 4x51/4 piece of white card stock with the Happy Birthday embossing folder.  I used some ribbon that was in my stash.  I used a flower that I had put together with a flower brad.  Very simple card to make.  I used some foam tape to raise the Happy birthday embossed card stock. I used a vellum sticker from Anna Griffin, (didn't take a pic of that.)for the sentiment inside.

I'm going to be making more of these cards and use whatever ribbon I have in my stash and flowers.  Like I said I have lots of embossing folders so I will be able to make plenty of cards like this. 

Thanks for stopping by and taking a look.  Have a great Sunday and I will try to post another card tomorrow.

Tuesday, August 18, 2015

Baby Cards.

Good Morning (2:20 A,M.)   I hate when I fall asleep early and then I wake up and can't go back to sleep.  Decided to get up and now I'm watching some TV hoping to fall back asleep.

I finally fell back to sleep and now its a normal hour of 8:25 A.M.  Much better.

Yesterday I needed some baby cards that My niece had wanted so I decided to make these two.


The first card all the cuts are from the cart BABY STEPS.  I pop dotted everything to give it depth. The second card is the inside.

The third card the crib is from 9 months cart.  I used my cuttle bug to emboss the crib.  Welcome baby girl saying is from the cart Phrases.  I used the print and cut feature for that.

Everything was sized in CDS.  These are going to my niece for her stash of cards.

Thanks for looking and have a great day.


Sunday, August 16, 2015

HAPPY FIRST BIRTHDAY and other things.

Good morning.   Its been a while since I posted on my blog.  It's been so neglected.  This has been a busy summer and its just about over.   3 of my 7 grandchildren are back at school.  My son-n-law is almost done with his radiation. Only 4 more to go.  Then the next step in this process, will be to make him able to talk again with prostheses.
My oldest grandson was in a car wreck and broke the humouris bone in his right arm 7 places. Below is a picture of his arm before surgery.


He had to have 25 tiny screws and a plate put into his arm to fix it.  We go tomorrow to get the staples out and exrays to make sure its healing right.  Then physical therapy.
 
Okay now on to better things.   I needed to make a birthday card for my great-great-niece so I decided to  make a pop-up- box card.   I searched u-tube until I found the one that I liked.  This is the video that I decided to go with.  Sandi Maciver is the lady and she goes step by step on how to make this card.   I don't have Stampin up products, so I went to cds and search for what she used on my cricut carts and found some things to use. I sized everything to fit on my card.
https://www.youtube.com/watch?v=DmODC...
Here are the pictures of my finished card.  I like the way it came out.


There is a place on the back to write on.   thanks for looking and have a great Sunday,


Thursday, June 18, 2015

Graduation

I'm back with another post this week.  I needed to make 2 graduation cards and I was searching u-tube for ideas and came across Debra from dinglefoot.com had made a graduation cap and tassle.
I liked the way the card looked so I decided to make two. 

The cards are 5x5   The tassles are made from embroidery yarn.  The stamp that I used if from CardzTV.    

This is the inside of the cards.  


I decided to make a card for the inside also.   I used the cart called RECESS for the cap and diploma.

I had a lot of fun making these.  Thanks for stopping by and have a great week

Sunday, June 14, 2015

My New Great-granddaughter

Its been awhile since I last posted.  I haven't really been crafting much.  I have lots of projects that I want to do and I have all the materials that I need for all the projects, now I just need to start on them.

First off I want to introduce you to my new great-granddaughter. She arrived at 12:36Am June 13th
weighing in at 6lb 13oz 18" long.  the picture below was taken about 15 minutes after she was born.

                                          This is Pheonix Rain Riley  She looks like her older brother.


Next is my baby card that I made watching a video.  Sorry I can't remember you I was watching to learn how to do this style of a card, but I want to thank her and give her credit.  It was easy once you get the cuts right.  Its called a Block Stair Step card.


I used my Explore for cutting the stork,   and the print and cut feature for the scalloped baby circle.
I used a CARDZTV stamp CONGRADULATIONS ON YOUR BABY.  I used some stickers also that I had in my stash.   This one is for a boy.
I really like the way it turned out.  I plan on making more of these as soon as I find the video of this type of cards.

Thanks for looking and have a great week.

                            Vickie

Wednesday, May 20, 2015

Mini Frame shadow box

I received an email from Michaels for the Door buster sale that they will be running ( didn't read all of it so I can't remember what day) and on the site they had a mini Frame shadow box  and the  directions on how to make it.

 I didn't have any of the materials to make one, so I made my own from a Graphic45  Mixed Media Box.  It measures 5x5x2".   I covered the box with pattern paper.  Its a K&Company Specialty paper stack.  the top was cut out, so I placed my pp and trace around so I would be able to cut my pp  in the right spot that I needed for the opening.


My Rose is  from the cricut cart Flower Shoppe cut at 9" and then rolled.  I made a stand for my rose to sit on to bring it closer to the opening.  I put a glue dot on the bottom of my rose to hold it in place.
I used some bling that I had in my stash on the front also.   I put a piece of wire on the back to be able to hang it up on my wall.

Thanks  for looking and please leave a comment on what you think.

Sorry  I forgot to load the picture.   thanks Brenda for letting me know.  DUH  I knew we were related.  LOL 

Wednesday, May 6, 2015

Up Date and Cards.

Prayers were answered today for My Son-N-Law Mike.  The doctor said that he has gotten all the cancer when he did Mike's Surgery.  The tested or what ever they do with the lymph nodes and they are were clear, all 67 of them.  They removed some of the staples but there was a leakage when they did an exray of his throat.   The Doctor said that with this type of surgery that Mike had it usually happens.  So another week with the feeding tube and next Wednesday when he has to go back they will try a sip of water to see how he does.  So still asking for prayers, but so far everything is good.  He will have to have 6 weeks of radiation, but he's ready.


I have been watching my youngest grandson, but I'm still crafting when ever he lets me of course.  He turned 2 last Friday and he is a VERY busy little boy.  Loves to be outside and I have a very big yard for him to play in.      


Also here is an up-date on my baby birds that are in a planter hanging on my front porch.


 This is the momma and she squawks every time I walk past them.  In fact she swoops down and of course I duck.  You would think by now she would know that I'm not going to hurt them.

And here are the babies.  They are almost to big for the nest. They are growing.

Now for my crafting, here is what I'm doing.  I love to watch videos and to craft right along with the person that is doing the video.  I found this u-tube channel with Schell Fabian (babytweetums).  She does this Mickey & Minnie card series and I wanted to follow along and make the cards.  I will post the pictures then explain what I did in DS with my Explore.


This a gate fold card.  I took circle and made it 1" and the ears a little smaller and welded them together to make my Mickey and Minnie face.  The sentiments are written using the write feature. I used the artiste cart for one of the sentiment  and the other one is from Elegant Edges cart.  I like the way they came out and also my Mickey and Minnie heads.  the bow for Minnie was in my stash.
 
Thanks for stopping by and looking  and I know this was a long blog, but had a lot to say.  Hope everyone has a great rest of the week and a great weekend.  Happy Mother's Day to all my blogger friends. 

Tuesday, April 28, 2015

Mini Album and New Great-grandson Skylar

A lot has happened since my last post.  My S-N-L  had  a mass removed from his throat on the 18th of April.  This was done at Norton's Hospital down town in Louisville, Ky. He was diagnoised with stage 3 Sqaoumas Cell Carcinoma. They are not spelled right but you get the idea.  They did get all of the mass out and will get results on the 6th.  They had to remove his vocal chords and his voice box and lympnoids.  So far so good he is doing good.  He got to come home last  Friday, 6 days after his surgery. My Daughter is taking excellent care and giving him his meds and of course he still has a feeding tube until they do the swallowing test on the 6th also.  So proud of her.  So please keep Michael in your prayers that he will be able to swallow.  He will still have to have radiation after he heals and also a tract.

Now on to some happy news. My great-grandson was born on April 22nd at 4:59 in the morning. Skylar weighed 8lb 10 oz.  and was 20" long.
 This is Skylar


The second picture didn't come very clear, but that is Kylar hugging his baby brother.


Now on the my mini album. This is not my idea but Ginger( My Sisters Scrapper)  She makes the most amazing mini albums.
The papers are all from Graphic45 Botanical Tea.  I love this paper.   This mini album is called
a Water Fall Folio.  So easy to make.  If you can, go check out Ginger's u-tube channel.


I still have to add the ribbon to the tags that fit in the side pockets.  This was an easy folio to put together.  It took my longer to figure out what to do with the front than it did to put it together. 


Thanks for stopping by and have a great week. 

Sunday, April 12, 2015

Zoo Train

Hope every one had a great weekend. and was able to get out and enjoy the beautiful weather if you had it.  And for those that didn't and couldn't be outside I hope you had a day full of crafting. Yesterday I was outside all day mowing and when you have almost 3 acreas that has too be mowed it can take all day. 
 
My oldest granddaughter is having her second baby due April 22 and she is having another boy.  The church that she and her husband go to are giving her a baby shower tomorrow night.

 I wasn't sure what to give her so I started searching U-tube, because I new I wanted to make something for her that she can keep for a long time.  I came across this one u-tube channel where this Lady was making a Train.  Her name is Victoria Bunn.  Now what I'm going to post is strictly her creation and I only added the bakers twine to be able to pull it.
                              This is the front of my Train.  The wheels are buttons that I had in my stash


                                                     This is the back of my  Train

The things in side the cars are not what I will be putting in them, but to be able to post I needed to put something in them. I'm planning on putting baby powder, shampoo, and what ever I can get to fit.
I also used the print and cut feature for the lion, bird, elephant,  horse, and giraffe.  I didn't write down the names of the different carts that I used.  I also used some stickers that I had in my stash.


Here is the card that I made also.  I did every thing on my explore and used the print and cut feature.
Thanks for looking and hope everyone has a great week.


Wednesday, April 1, 2015

GOOD MORNING

I can't believe that it is already April 1st and Easter is only 4 days away.  I'm just about done with my Easter bunny boxes for my grandsons and great-grandsons.  My oldest Daughter is going to have the Easter Egg hunt here at my house, because I have 4 acres that she can hide the eggs in.  She will probably only use the front yard so the little ones can find them.

I finished up my Easter cards that I will be mailing out today and hope they get them before Easter.
I used Anna Griffin THE GARDEN WINDOW card making kit that I had purchases last year for my cards.  I thought this kit would be perfect for Easter cards.

Thanks for looking and have a great Wednesday  I'm entering this in the FCCB challenge this week,
http://fantabulouscricut.blogspot.com.  I used the Easter 2010 cart for the basket on the last card.  Happy Easter was cut from two different carts on my cricut Explore.

Vickie

Monday, March 30, 2015

Happy Easter

Easter is just 6 days away and I'm now starting my Easter projects. In my last post I showed you my bunny boxes that I made. 

I decided that I wanted to make cards for the little ones so they could keep there bunny box and bunny card for there first Easter.

The bunny is from Easter 2010 cart has well as the pink bow. I searched through the cricut library to find a bow tie and found one on the Paisley cart.  I used a wiggley eye on each bunny.  I inked the edges with some brown that I had in my stash.  The sentiment was written using the write feature on my Explore  FIRST EASTER.. This will be  my great-great-niece's first Easter so the pink one will be her card and my great-great nephew will get the blue one. I will be entering this in the BBB2 http://heather-bittenbythebug2.blogspot.com challenge for this week.

I used Elegant Edges for the mat to write on.   Everything was sized and cut with my Explore


I also did a card for my great-great niece's Parents. This card was done with all scraps from the bunny boxes. I used the EASTER 2010 cart for the basket.  The EASTER is from CTMH Artiste card.


Thanks for looking and hope you all have a great night.

Saturday, March 28, 2015

HAPPY EASTER FROM ELMO

I'm making Easter baskets from a file that someone gave me to use.  Here are three so far.  Pink for girls and the blue for a boy.  I have 3 more blue ones to make.
                                                                             FRONT

BACK


My great niece LOVES Elmo.  I thought I could purchase an Elmo image from my Explore and down load it into DS. This is the image that I down loaded.


I down loaded the picture into CRICUT DESIGN SPACE and duplicated it 4 times so I could attach his hands to make it look like a circle.


I then went back into DS  and found bunny ears that I wanted to use and sized them to fit Elmo's head.

  I really do like the way it came out, It could be better, but for my first time.

Thanks for looking and HUgssssssssss  


Vickie

Monday, February 23, 2015

What I'm working on

Good morning from the deep freeze here in Kentucky.  I think all of us are so ready for the SNOW and COLD to be gone.  One good thing about all this non forgiving weather is that we are able to get more crafting done, because we can't go outside.

I was searching u-tube videos on making Mini Albums and came across this video from Shellie Giegle   www.designsbyshellie.blogspot.com   This is her blog address and from there I think you can find her u-tube channel.   She is using The paper stack from Heart Felt Creations Rain Drops on Roses.  I don't have this stack so I decided to use a Stack by DCWV called THE BUTTERFLY GARDEN
I am using my cricut Explore and DS to cut everything or to use the print and cut feature, to try and get the same paper features that she is using.

Here is the front of my album and I will let you know what I used .


The roses are from the Art Deco cart.  I used the print and cut feature for these. The frame is from Elegant Edges I think.  I went back into DS to try and find it but of course I couldn't, so I'm guessing on the frame.  The hat is from Kate's ABC'S.  I used some bling that was in my stash to accent the frame.  The butterfly is from the $ bin from Michaels. I used some string pearls on the side with the Lace.
The medal ornate plate is from Tim Holtz.  This is the first time that I have used these and I think I'm really going to like these. I sized this in DS and used the writing feature to write Memories.
The tag Cherish was cut and sized also in DS. 

Page one of my album


In Shellie's video for page one she had a cutout of a window.  So I google searched for a window and came up with this one.  I used the print and cut feature.  The base paper I used was 12x12 cut down the middle.  I used one side for the left and the other for the right.   I used two different MS punches to accent the top of the pocket and the left side to make a small side pocket.  The flower and the butterfly were in my stash.  I used the writing feature for LIVE IN THE MOMENT.  Looking at it now I should have spaced it better. I will go back and fix it later.

 This page shows the window fame opening for another place for photo mats or journaling tags. The rose on this page is opaque flowers that I had gotten at a garage sale over the summer.  I used the MS punch again to accent the top of the side pocket on right and the bottom pocket on left.

Thanks for looking and there will be more pictures to follow as I finish the pages. Please check out Shellie's blog and u-tube videos. She also has a brick and mortar shop and also an online store also.

Stay warm everyone and I will see ya leter.