Thursday, January 8, 2015

Happy Birthday

I'm really liking my Explore now that I've finally figured out how to use it.  I've watched TONS of video on how to do things till I should know them by heart. (NOT).  I'm getting better everyday. 
Today I made a Birthday card and I still have 3 to go.  2 are for a 8 year old and my great-grandson will be 1 on Jan 24th, so his card will actually be for his mom and Dad to put away until he gets bigger and understands what they are.

Any way enough rambling and I will post my card and then tell you what I did.


I have the subscription for the cricut library so I'm able to use different cuts from cartridges that I don't have. The balloons are from the BEST FRIENDS cart and this is a print then cut. I really like this feature on the Explore. Then it cuts it out and wa-la you have your cut already to go on your card.
I used bakers twine for the strings on the balloon for the inside of my card.
The Happy Birthday font is from Nate's ABC's  and I use the writing feature for this and then cut it out.  I used my colored pencils to color the letters to make it stand out more.  I popped up the balloons for more  damention.  Thinks for looking and have a great day.
 

Monday, January 5, 2015

Card Day

Today was cold and I thought I'm no going out so I decided to browse pinterest for masculine birthday cards.  I need 3 cards.  2 adults and in child.  The child is easy, its the adults that I have a problem with. While looking thru the different cards I found anniversary and a birthday card that I really liked.  Did I say that I needed to anniversary cards?  Yes  I needed 2 of those also. So needed to say I decided that I wanted to do the anniversaries now and also the one birthday card.  I will post them and then tell you How and what I did to make them.  I wish I could remember who made them first so I could give them credit, but of course I didn't write the names down.  But Ladies whom ever you were Thank You.  I enjoyed making them.

Here is the first one.

 
First off for this card its not a typical A2 size or even a 5x7.  The squares are 1.25x1.25 and I cut 9 of them. I used 9 different cuddlebug embossing  folders.  Then I went back into design space and looked for an oval for my sentiment. I did it different because I wanted to be able to open it up and say Dan & Aimee.  The picture below will show it opened.  I also in CDP added the text and wrote the sentiment with pen from American Crafts called Slick Writer.  These work perfectly in my Explore.  The Heart was also sized in CDS and I used a heart embossing folder and the shadow and popped it up for demention.


  When I took the picture I hadn't put the names in yet. but it will say Dan & Aimee. I also used a MS punch called Lace Doily.  I thought it would look good.   The ribbon I had from my stash.

 This is the inside of the card which now is not blank. I used the MS punch again and the ribbon.


 Here is the name of the pen that I used in my explore to write the sentiment.  This was the first time that I ever tried this and I loved it. Below are more pictures of the pen.


Next is the next anniversary card that I made.  Idea from pinterest also.  First I googled to find out what colors are for being married for 40 years. The color is Ruby Red.   I used red for my card base and for the 40 years. I used an Anna Griffin embossing folder called Francesca Lace. I have quite a few Anna Griffin embossing folders and they are really pretty. I hope to use more of my folders this year, or that is my goal anyway.

 The sentiment is from Anna Griffin from the Garden Window card Kit and so is the saying for the inside of the card.
 
 
 The fabric flower that I used was from some embelishments that I had gotten at Tuesday Morning.


My next card is a birthday card that I made for my SIL and I found this on pinterest also.

So as you can see I still have to look thru pinterest for my masculine birthday cards, but at least these three are done and finished and I can mail them out tomorrow.  Thanks for looking and have a great week and get some crafting relaxing time whenever possible.

Friday, January 2, 2015

My Valentines

I decided that I wanted to make something in CDS and my explore.  I went searching for different things I wanted to use on my page. I typed in square and of course a lot came up.  I liked the grid and decided to use that one.  I cut it out three times to make it pop up.  Then I added the pictures.
 
 
Bottom picture is my youngest grandson Colton.
Top is my youngest great-grandson Kylar
Left is my oldest great-grandson.
Right is Dalton my grandson
&
Klayton my grandson
 
These are just the youngest ones.  I have a 14 and 18 year old grandsons
and 2 Granddaughters. ages 22 and 20
 
The background paper was from my stash.  I typed in heart and a lot came up, and I decided to go with a simple one.  I sized it in CDS and also the shadow.
 
I am entering this is the Lasting Memories http://kcclayoutchallenges.blogspot.com  new monthly  challenge.  The challenge for this week is Simple Pleasures. And of course my youngest grandkids and great-grand kids are my Simple Pleasures.
 
thanks for looking and have a great weekend.

Thursday, January 1, 2015

Happy New Year

Happy New Year too all My fellow bloggers. Hope your new years eve was a nice one.
I'm entering this in http://conniecancrop.blogspot.com her monthly challenge "ALL THAT SPARKLES".  I got the idea for this card from Gloria  spyrorcks346 u-tube challenge. She does amazing scene cards. 
Thanks for looking and have a great rest of the week.

Saturday, December 27, 2014

Great+grandma

I've been watching tons of videos to learn how to use my Explorer.  I've got the basics down and now trying to learn to design in Design Space.   I typed heart in the search box and different images came up from different carts.  I sized them to the size that I thought would look good.  I tell more after I post the picture.

The back ground paper was in my stash so I'm not sure where it came from.  I cut the Great-Grandma out 3 time 2 in white and 1 red and popped it up. I cut the heart out and then cut the shadow out in white. The picture I cropped so it would fit in the heart.  I cut the dear to my heart out and popped it up also.  I found a picture that I liked of Great-Grandma Ruby and added to the LO.  I will be entering this in the HIMCR challenge this week    http://www.hidinginmycraftroom.com

Thanks for looking and comments are allowed.  LOL  
Have a great Sunday and Happy New Year.

Saturday, December 20, 2014

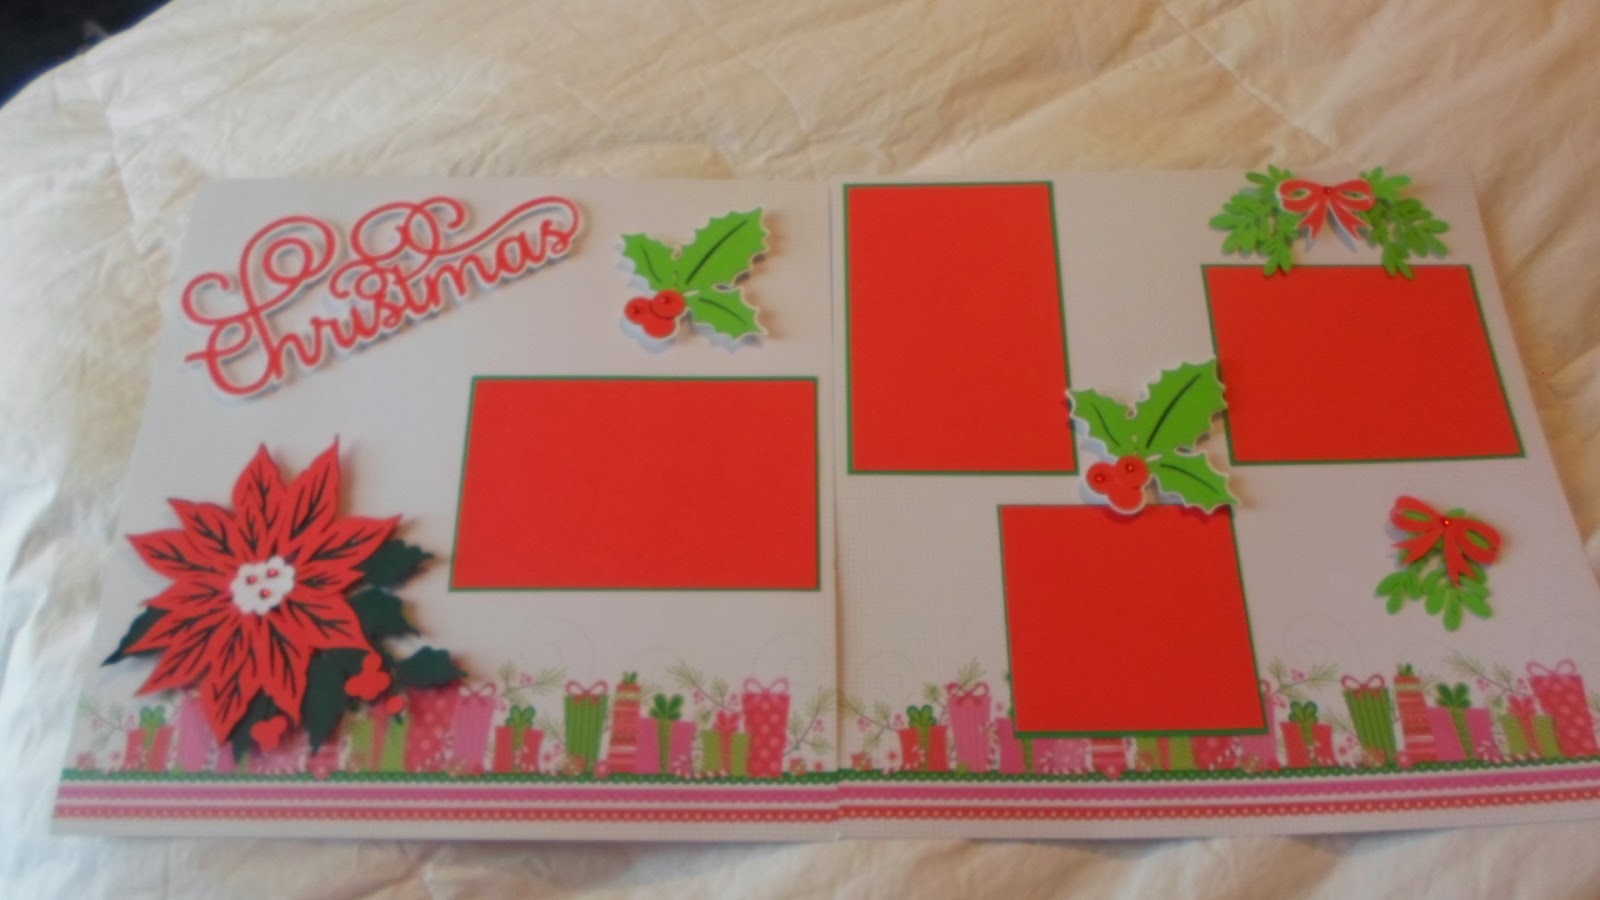
Christmas LO

First off I want to tell you that this is NOT my idea.   Diane Kielman from http://exploringcricut.blogspot.com made this 2 page LO  and I fell in love with it.  I did everything on my Explorer except the photo mats.


I popped up all the cuts from the Winter Wonderland cart. I also added some red gems to the Holy Berries, which you can't see in the picture.
I'm also entering this is the Lasting Memories challenge http://kcclayoutchallenges.blogspot.com.

Again I want to thank Diane for sharing your 2 page LO. 
Merry Christmas everyone.

Friday, December 19, 2014

Print & Cut

Merry Christmas everyone.  6 days till Christmas.  Yikes I still have a lot to do.  But that is the way it is at Christmas. Lots to do and you wonder if you will get done and then Christmas day comes and you thing WOW  I got everything done.

Things have been hectic for me this past few months starting with my SIL.  Doctors and Tests, But Thank God that she doesn't have cancer.  There is some problems, but nothing that can't be fixed.  Then my son-n-law almost died when he quit breathing and they couldn't incubate him.  He now has a trake, but he doesn't mind.  He has already gone back to work and does what he can. So I have so much to be Thankful for and so Blessed.  Everyone else is doing great.  My oldest Granddaughter
got married yesterday and also is going to be giving me a 2nd great-grandson due April 22, 2015.

Enough of the bad and the good news.  I have the Explorer and have been trying to learn how to use it. I've watched sooooo  many videos on how to's its not funny. Any way yesterday I decided to use the Print & Cut feature after watching a video from Mary from CARDSTV
 I love all her cards that she makes. Any way she made this card using a penquin that she had used the print and cut feature.  I wanted to do the Christmas Owl from CAC2 cart.
I had to calibrate my explorer at least 5 times before I got it right.  Below is the first two cuts that I did.  As you can see in the pictures that it was off.


The next two photos I changed the size and they came out perfect. Now I need to figure out how to make the colors  more pronounce.


Today I hope to make my Owl bigger for a card.
After the new year, I'm going to try using vinlyn and see if I can figure out How to do it.

Thanks for looking and all  comments will be very helpful.


Merry Christmas everyone